Installing new bike decals is one of the easiest ways to refresh your bike’s look — but if you’ve ever had them peel, bubble, or lift after just a few rides, you know how frustrating it can be.
In this guide, we’ll cover the most common mistakes riders make when applying graphics and show you how to get a smooth, professional result that lasts.
1. Check the Condition of Your Plastics
In a perfect world, decals would always go on brand-new plastics. But let’s face it — throwing away good panels isn’t ideal.
If your plastics are clean and free from cracks or deep scratches, your motocross graphics will stick just fine.
However, if the surface is rough or damaged, it’s best to invest in new plastics. A smooth surface gives your new decals the best chance to bond securely and stay looking great ride after ride.
2. Proper Preparation Is Everything
Before installing new dirt bike stickers, make sure your plastics are completely clean and free of any residue.
When removing old decals:
Use methylated spirits, alcohol-based cleaner, brake cleaner, or even petrol to dissolve old glue.
Apply gentle heat (from a heat gun or hair dryer) to help loosen stubborn adhesive.
Any leftover glue will prevent your new decals from sticking properly — make sure it’s all gone before moving on.
Even brand-new plastics need a quick wipe-down to remove the factory wax coating that gives them their shine. That wax can stop your decals from bonding, causing early peeling or lifting.
3. How to Install Dirt Bike Decals Like a Pro
There are many installation methods, but these tried-and-tested tips will give you consistently great results:
Wash your hands before starting to remove any oil or grease.
Avoid using water or soap when applying decals — trapped moisture can cause bubbles under the surface.
Before peeling off the backing, align the decal on the plastic to see where it fits best.
If your graphics are die-cut (like those from W-Ink), you can easily line them up with bolt holes and edges for perfect placement.
Start from one precise point, such as a corner or bolt hole, and work outward slowly. Smooth out any air bubbles as you go.
If something goes crooked, don’t worry. MX-grade vinyl is forgiving — simply peel it back and reapply.
Use light heat to make the material more flexible around tight curves and edges. Just don’t overheat — too much heat can make the vinyl too soft to handle.
Once everything is in place, give your graphics a final heat cycle over all corners and edges to activate the adhesive.
If small edges lift later, reheat and press them down — this helps “train” the vinyl to stay in shape.
4. Be Patient — It Pays Off
Modern decal materials are highly durable and repositionable, so take your time.
The final heating step is crucial: it activates the glue and locks the decals into place for a long-lasting hold.
5. Aftercare for Long-Lasting Results
It’s normal if a few small edges lift slightly during the first day or two. Just heat and press them back down.
Avoid washing or riding your bike for 2–3 days after installation — this gives the adhesive time to cure properly.
After that, you’re good to go — hit the track or trail with the freshest-looking dirt bike graphics in the pits!
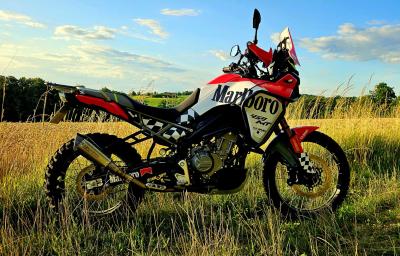
I recently ordered graphics for my motorbike from W-Ink — and the result exceeded all expectations.
The film fits perfectly: no bubbles, the edges fit snugly, and the colours are incredibly bright. After installation, I let the motorcycle stand for two days, as I wrote above, and now the stickers hold like they came from the factory.
My review: the quality of the material is top-notch, the design is cool and unique, and the service from the W-Ink team is fast and friendly.
I definitely recommend them if you are looking for reliable stickers that really make your bike stand out from the crowd.
Here is a link to my graphics — see for yourself:
\ud83d\udc49 My graphics on the W-Ink